Google Search Console
Follow the instructions below to set up your account
How to Submit your Site to Google Search Console
First, sign in to Search Console with the Google account you wish to be associated with your website.
The first time you log in, you’ll see a pop-up asking you to add a property (i.e., your website).
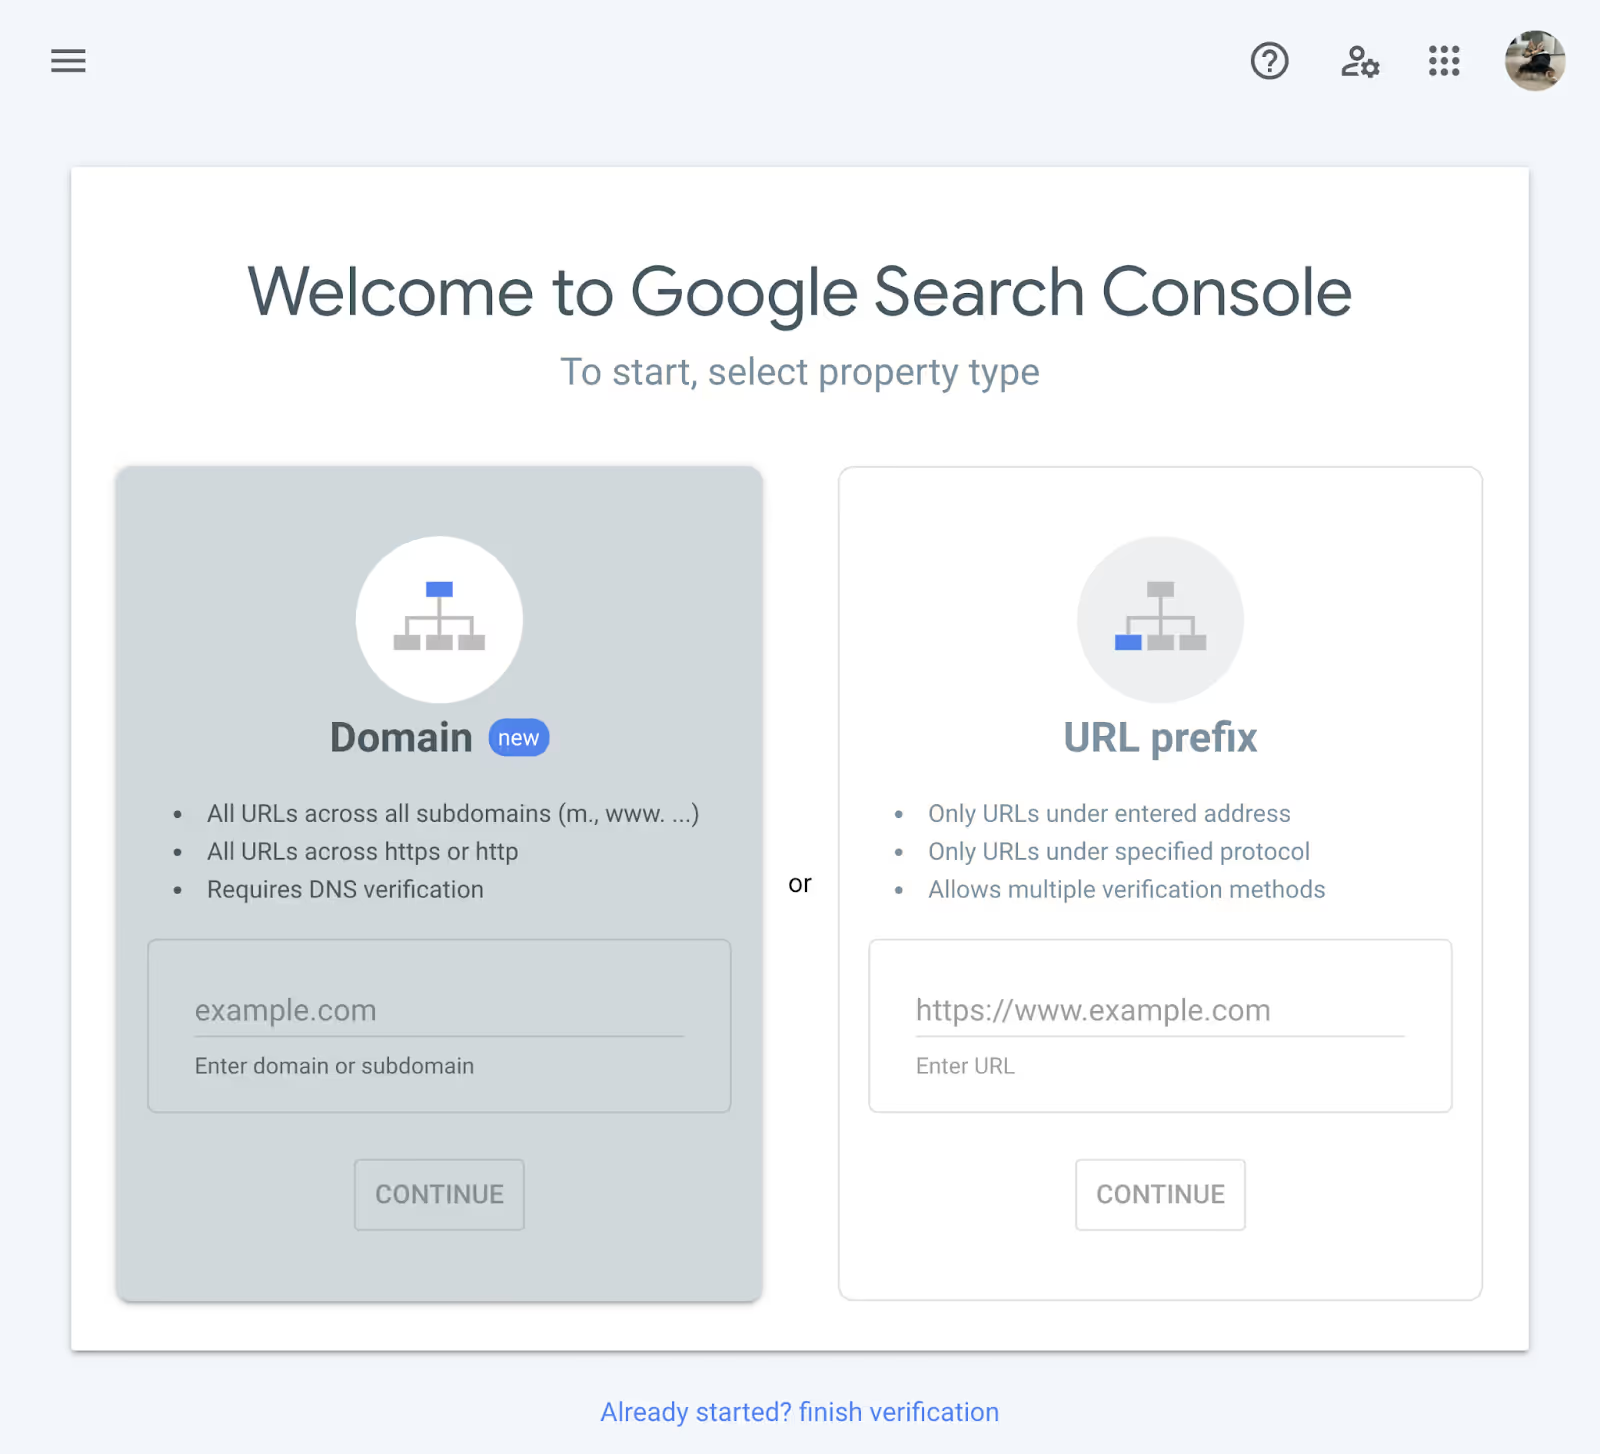
You have two options here: add a domain or a URL prefix. Please use:
Add a Domain Property
You will need to verify your domain through your DNS (domain name system) provider.
Here’s how the process works:
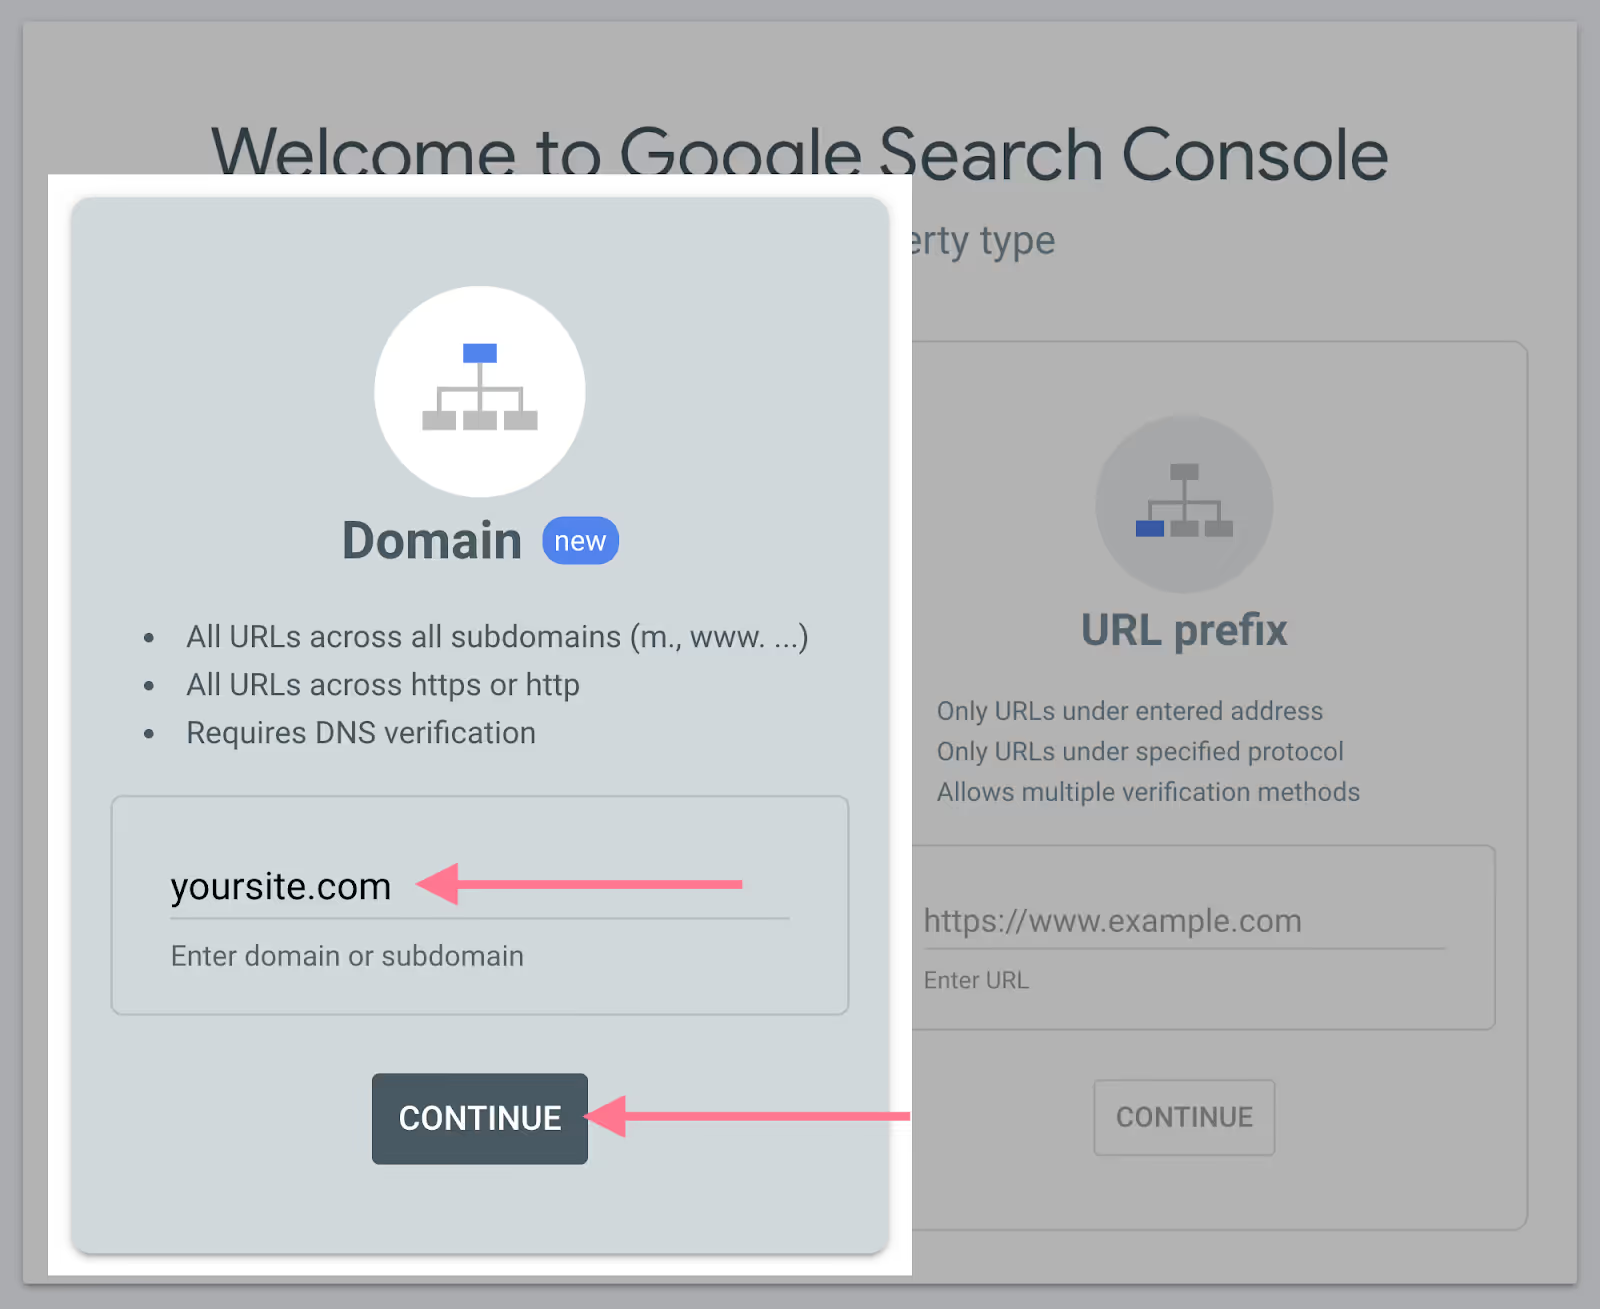
First, add your domain in the “Domain” option (without HTTP/HTTPS and www).
Let’s say your domain URL is “https://www.yoursite.com.” Enter “yoursite.com” in the blank space provided and click “CONTINUE.”
Verifying the Domain
First of all, if any of the instructions below are too challenging, please stop immediately and contact your NRH Media representative, as they will be happy to handle this with you live via screen sharing. So if the next steps are too confusing, please reach out to NRH Media directly.
If you have GoDaddy, there is a good chance it will let you connect directly. If the option does not appear, or you do not have GoDaddy, you will have to use the manual approach.
Copy the TXT record from the instructions dialog box.
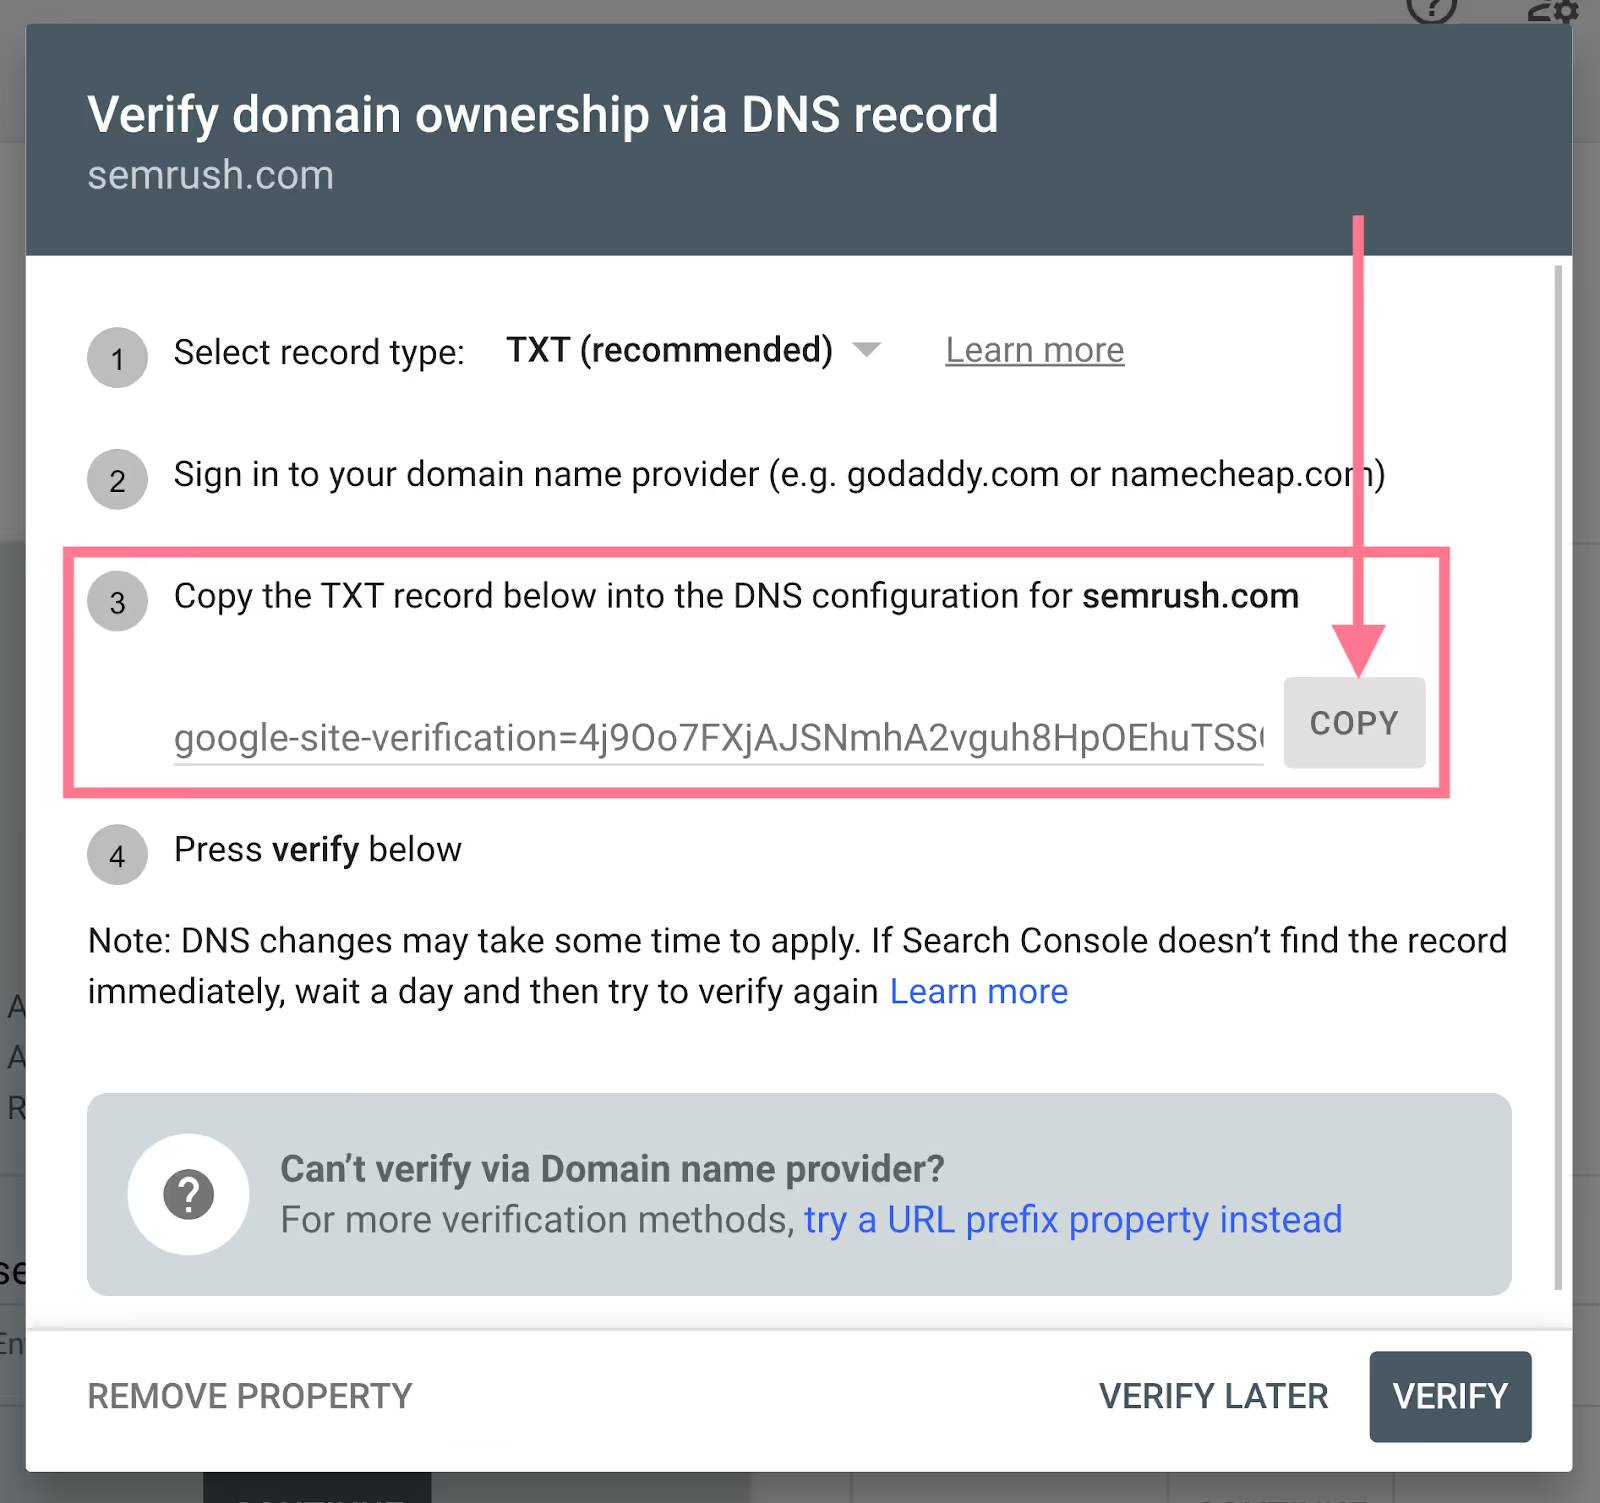
In a new tab, sign in to your account with your domain registrar. For this example, we'll use GoDaddy as our domain registrar.
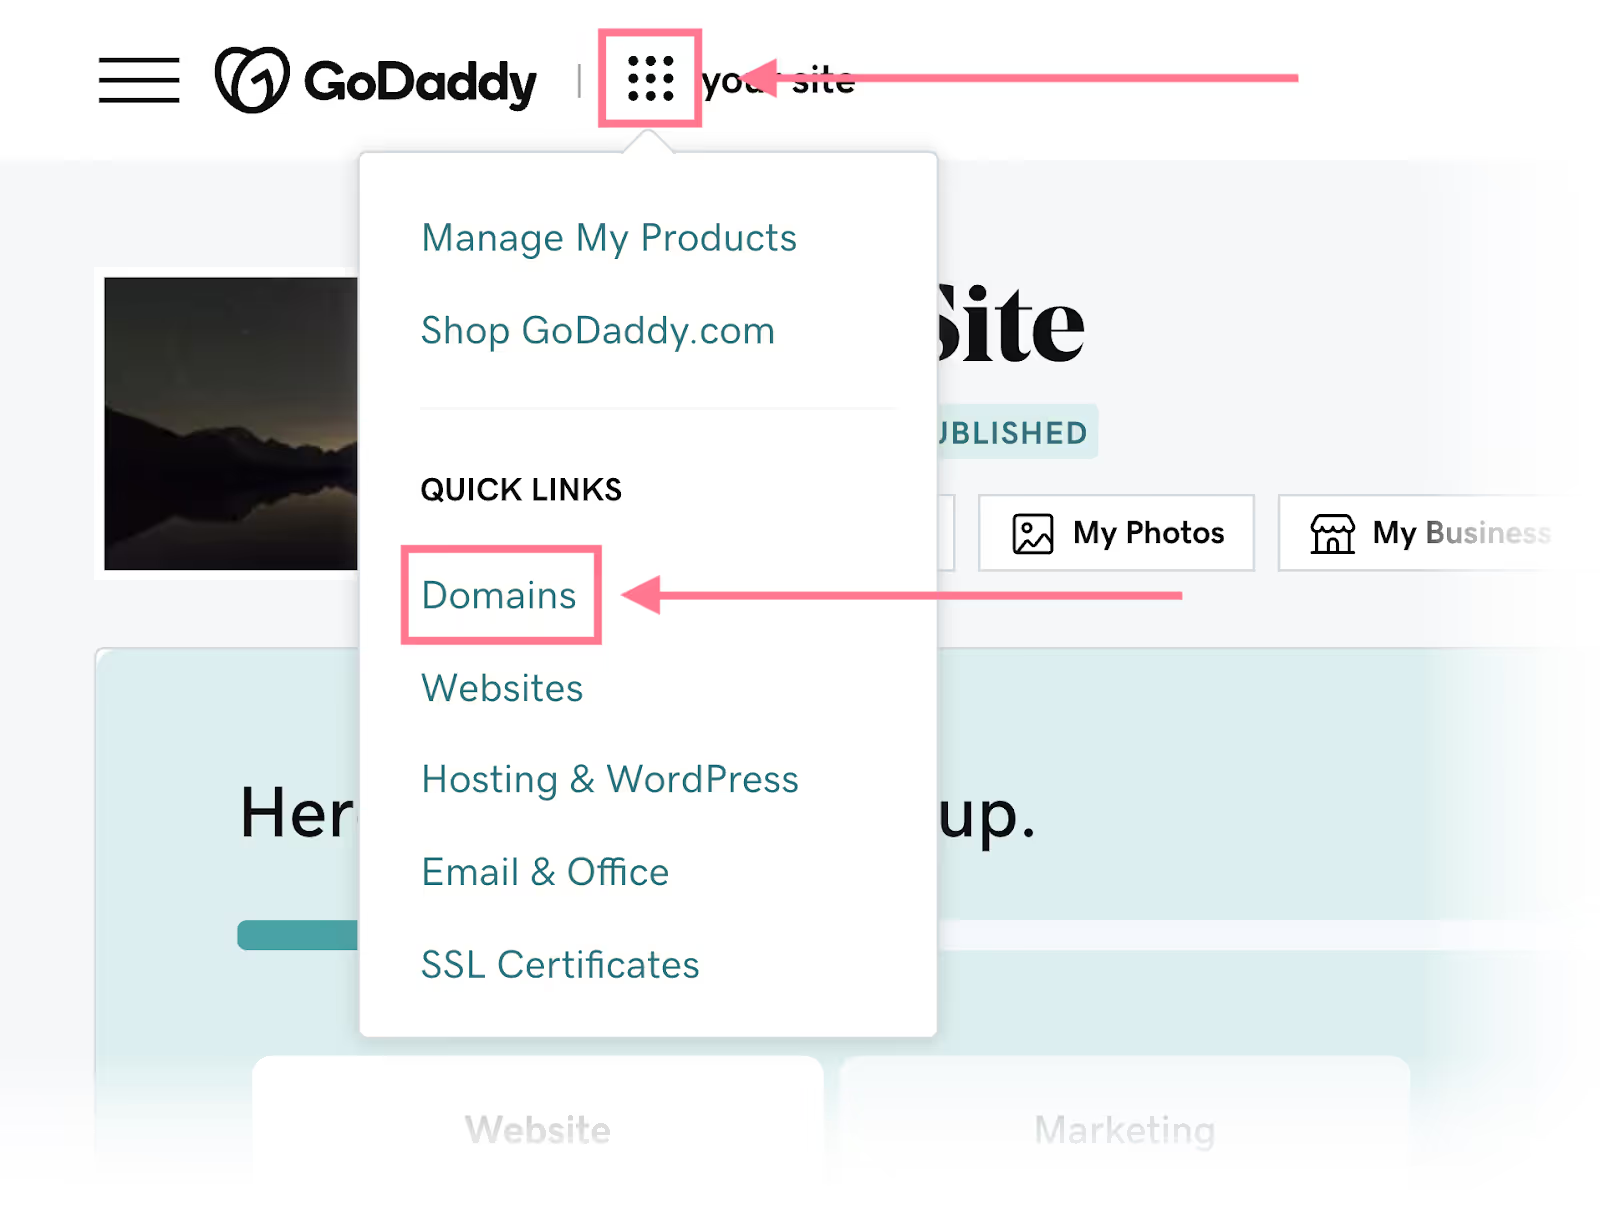
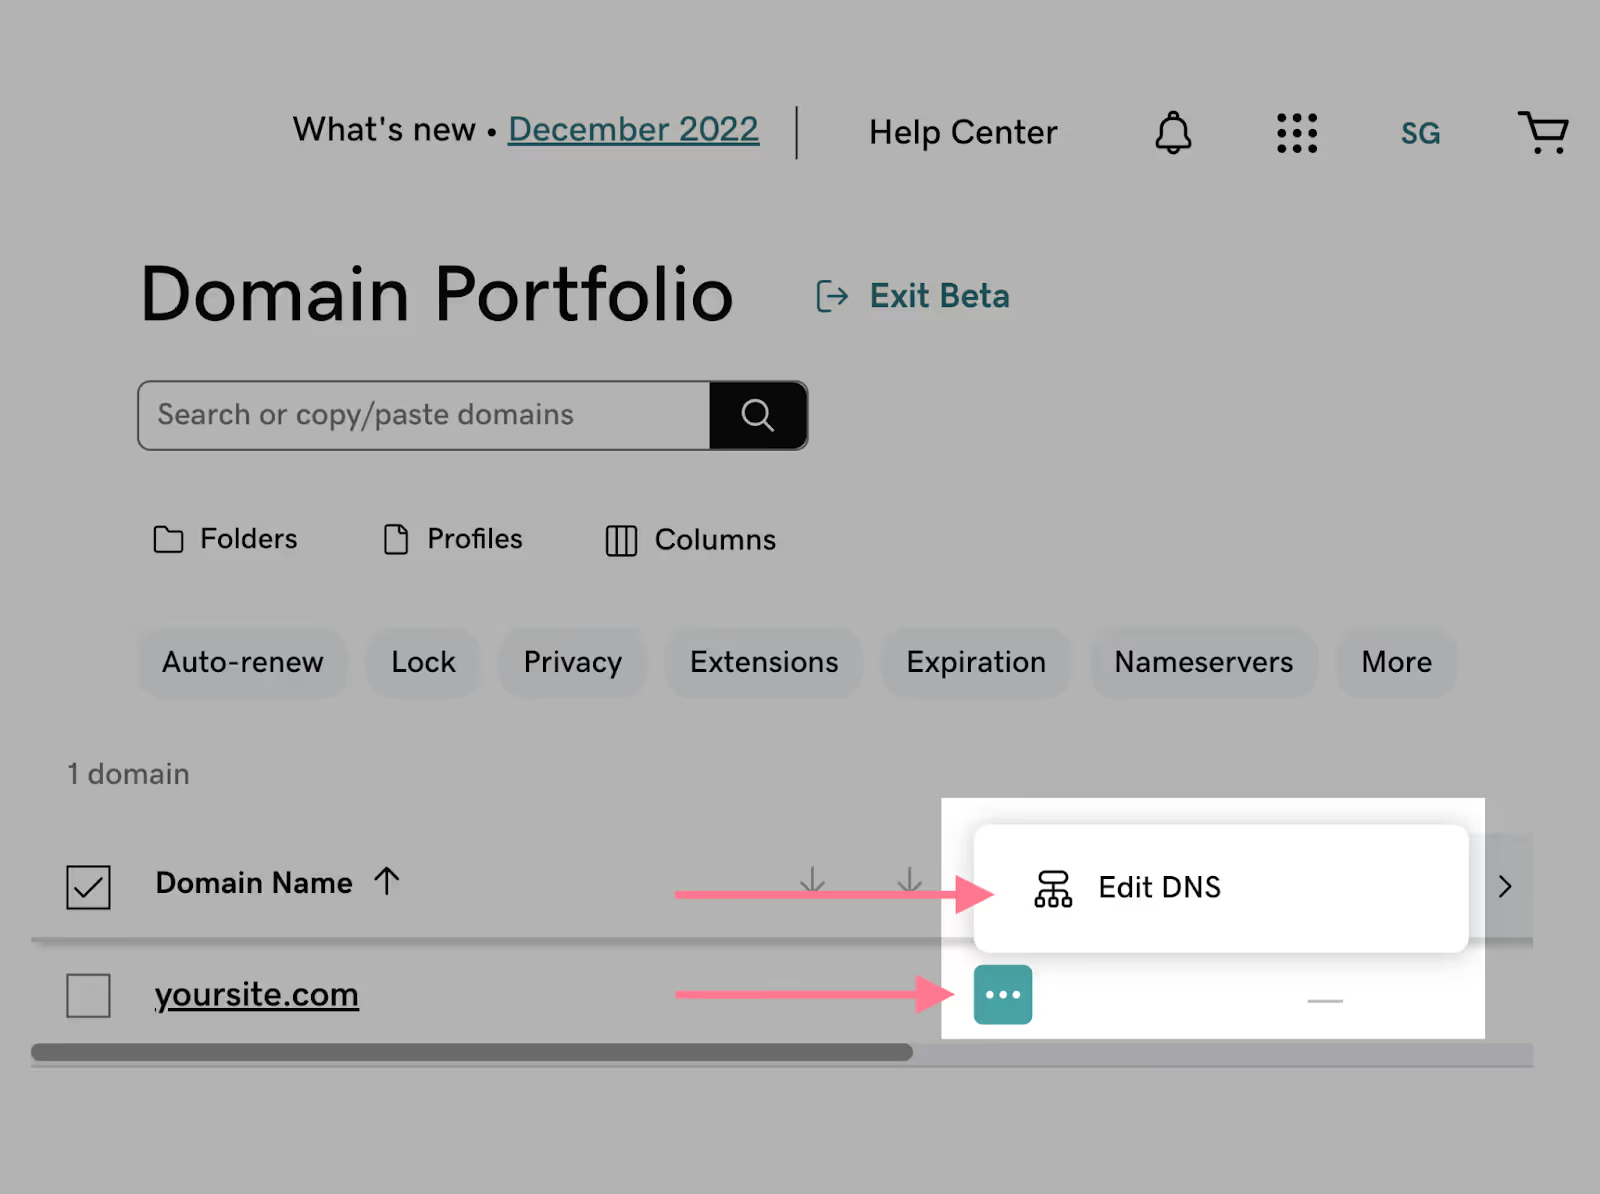
Once you log in, access your DNS settings by clicking on the nine dots in the navigation bar, beside your business name. And hitting “Domains.”
In your Domain Portfolio dashboard, select the three dots beside your domain name and click on “Edit DNS.”
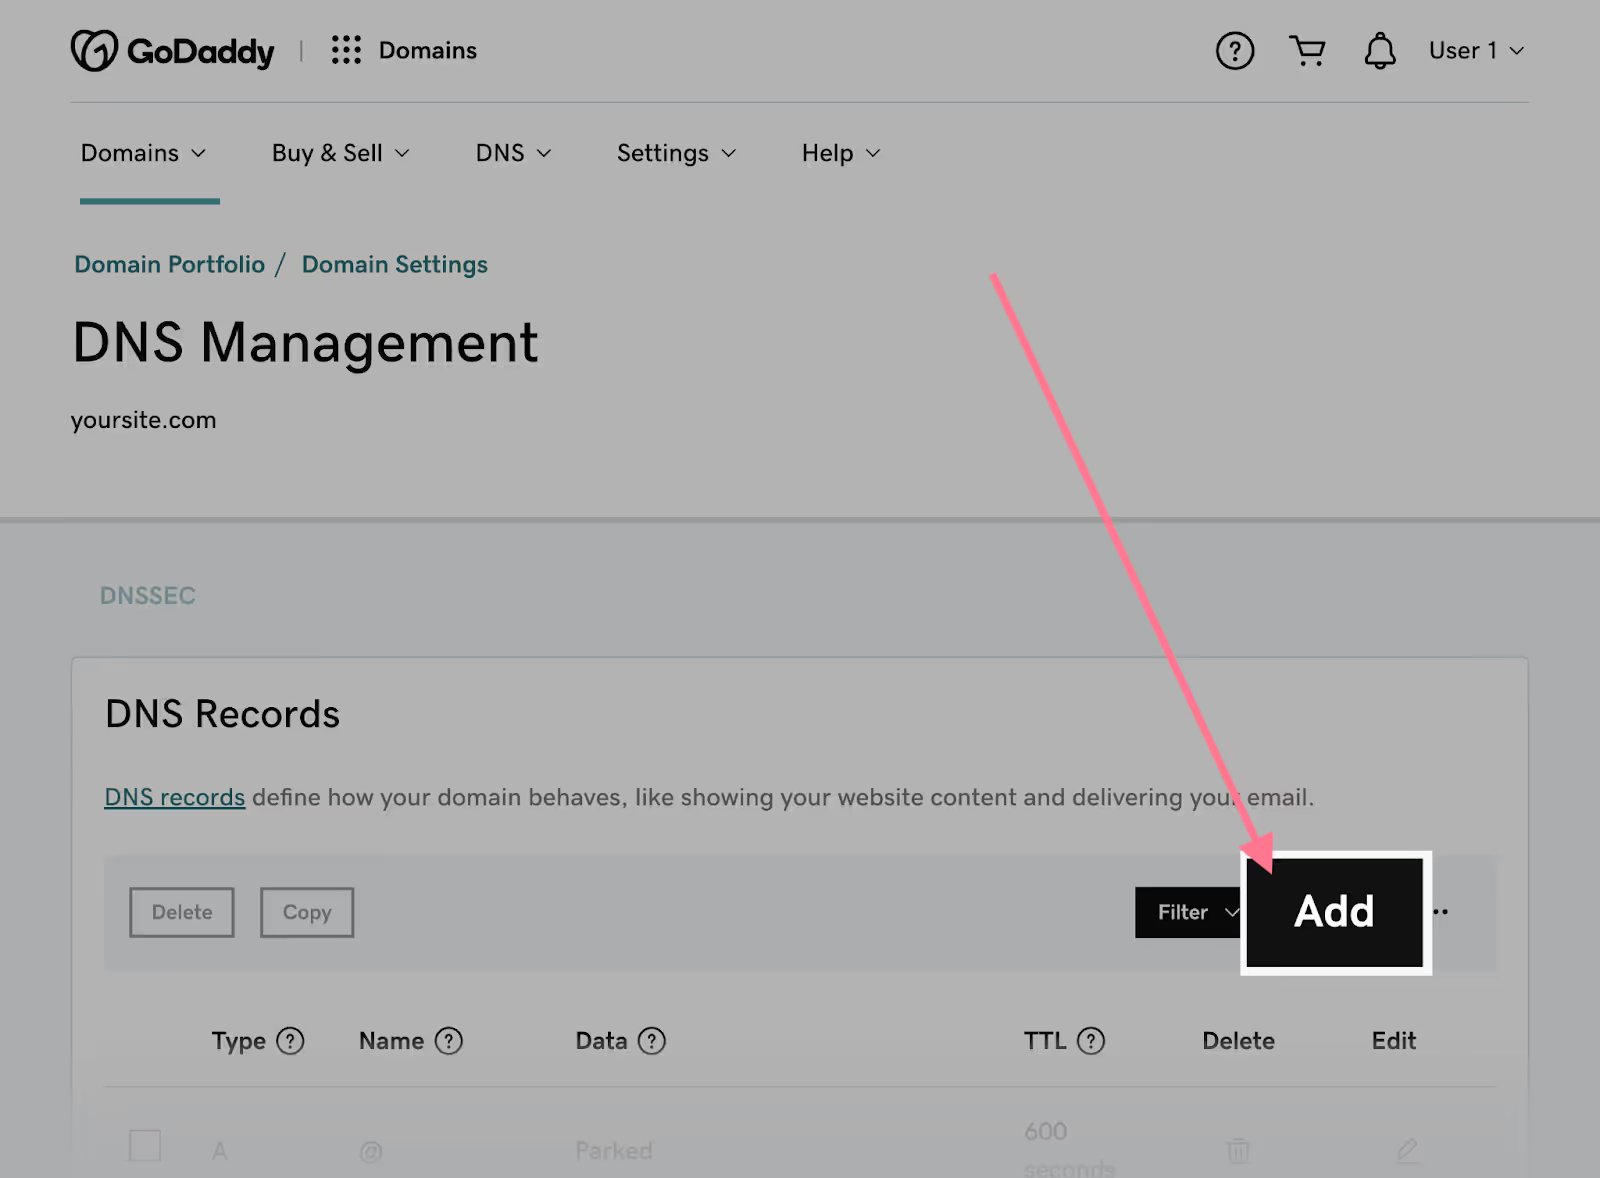
You should now be in the DNS Management window. Add a new TXT record by clicking “Add” in the DNS Records section.
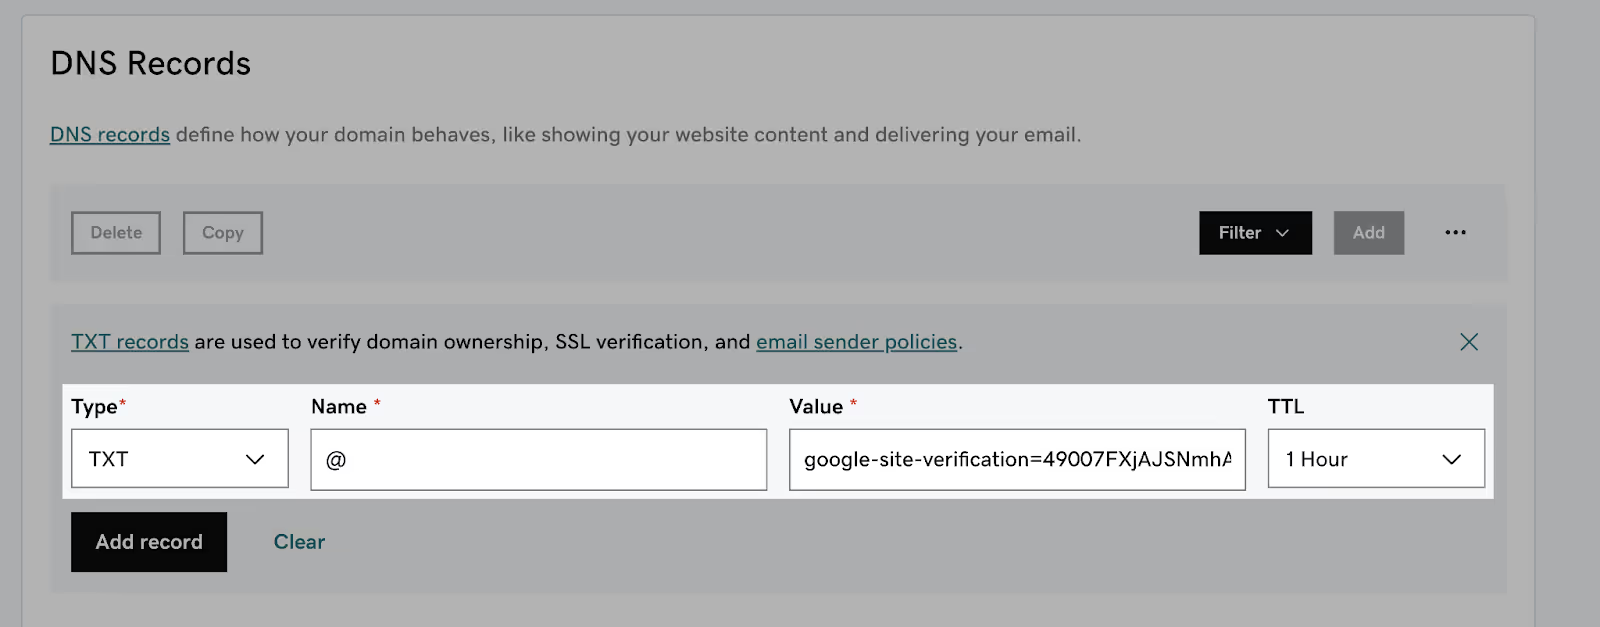
A form will pop up. Fill it out as follows:
- Type: TXT
- Name: @
- Value: [Paste the TXT record from Google Search Console]
- TTL: 1 hour
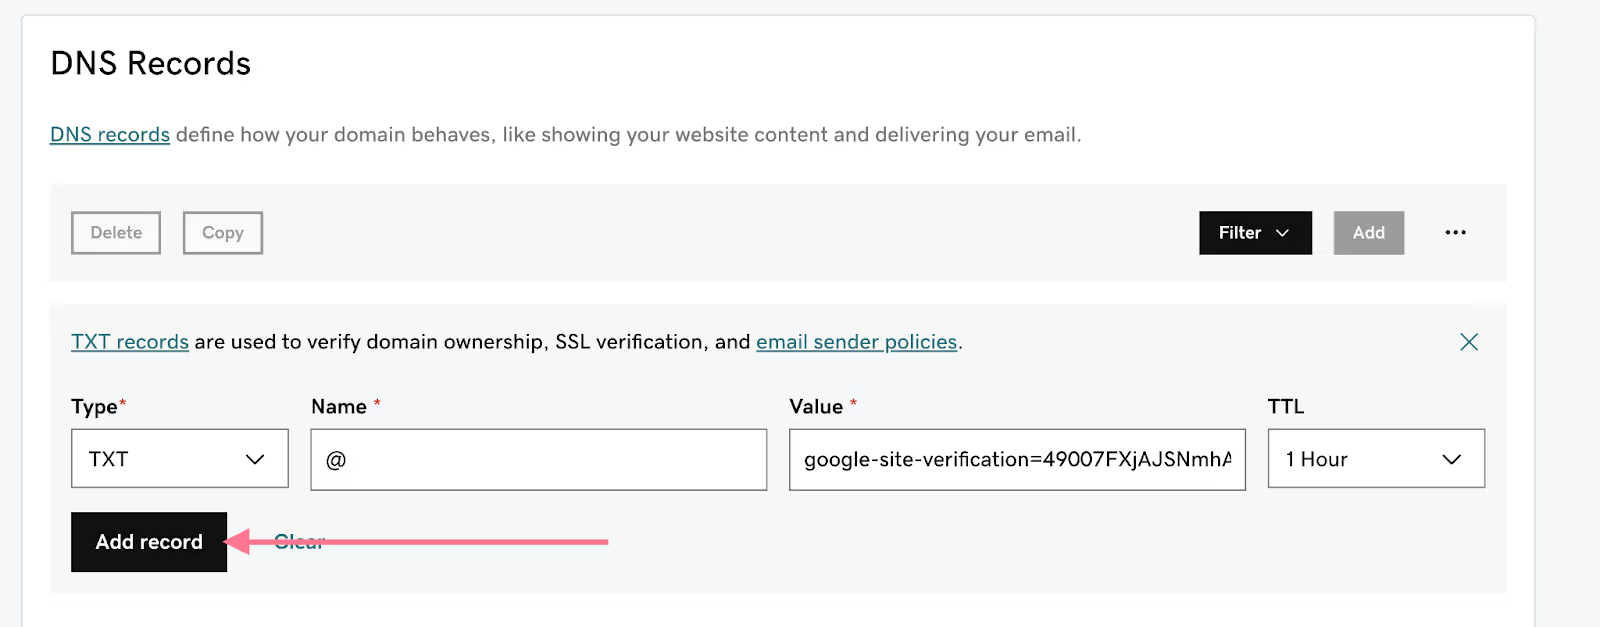
When you’re done, click “Add record.”
Now go back to Search Console and click “Verify.”
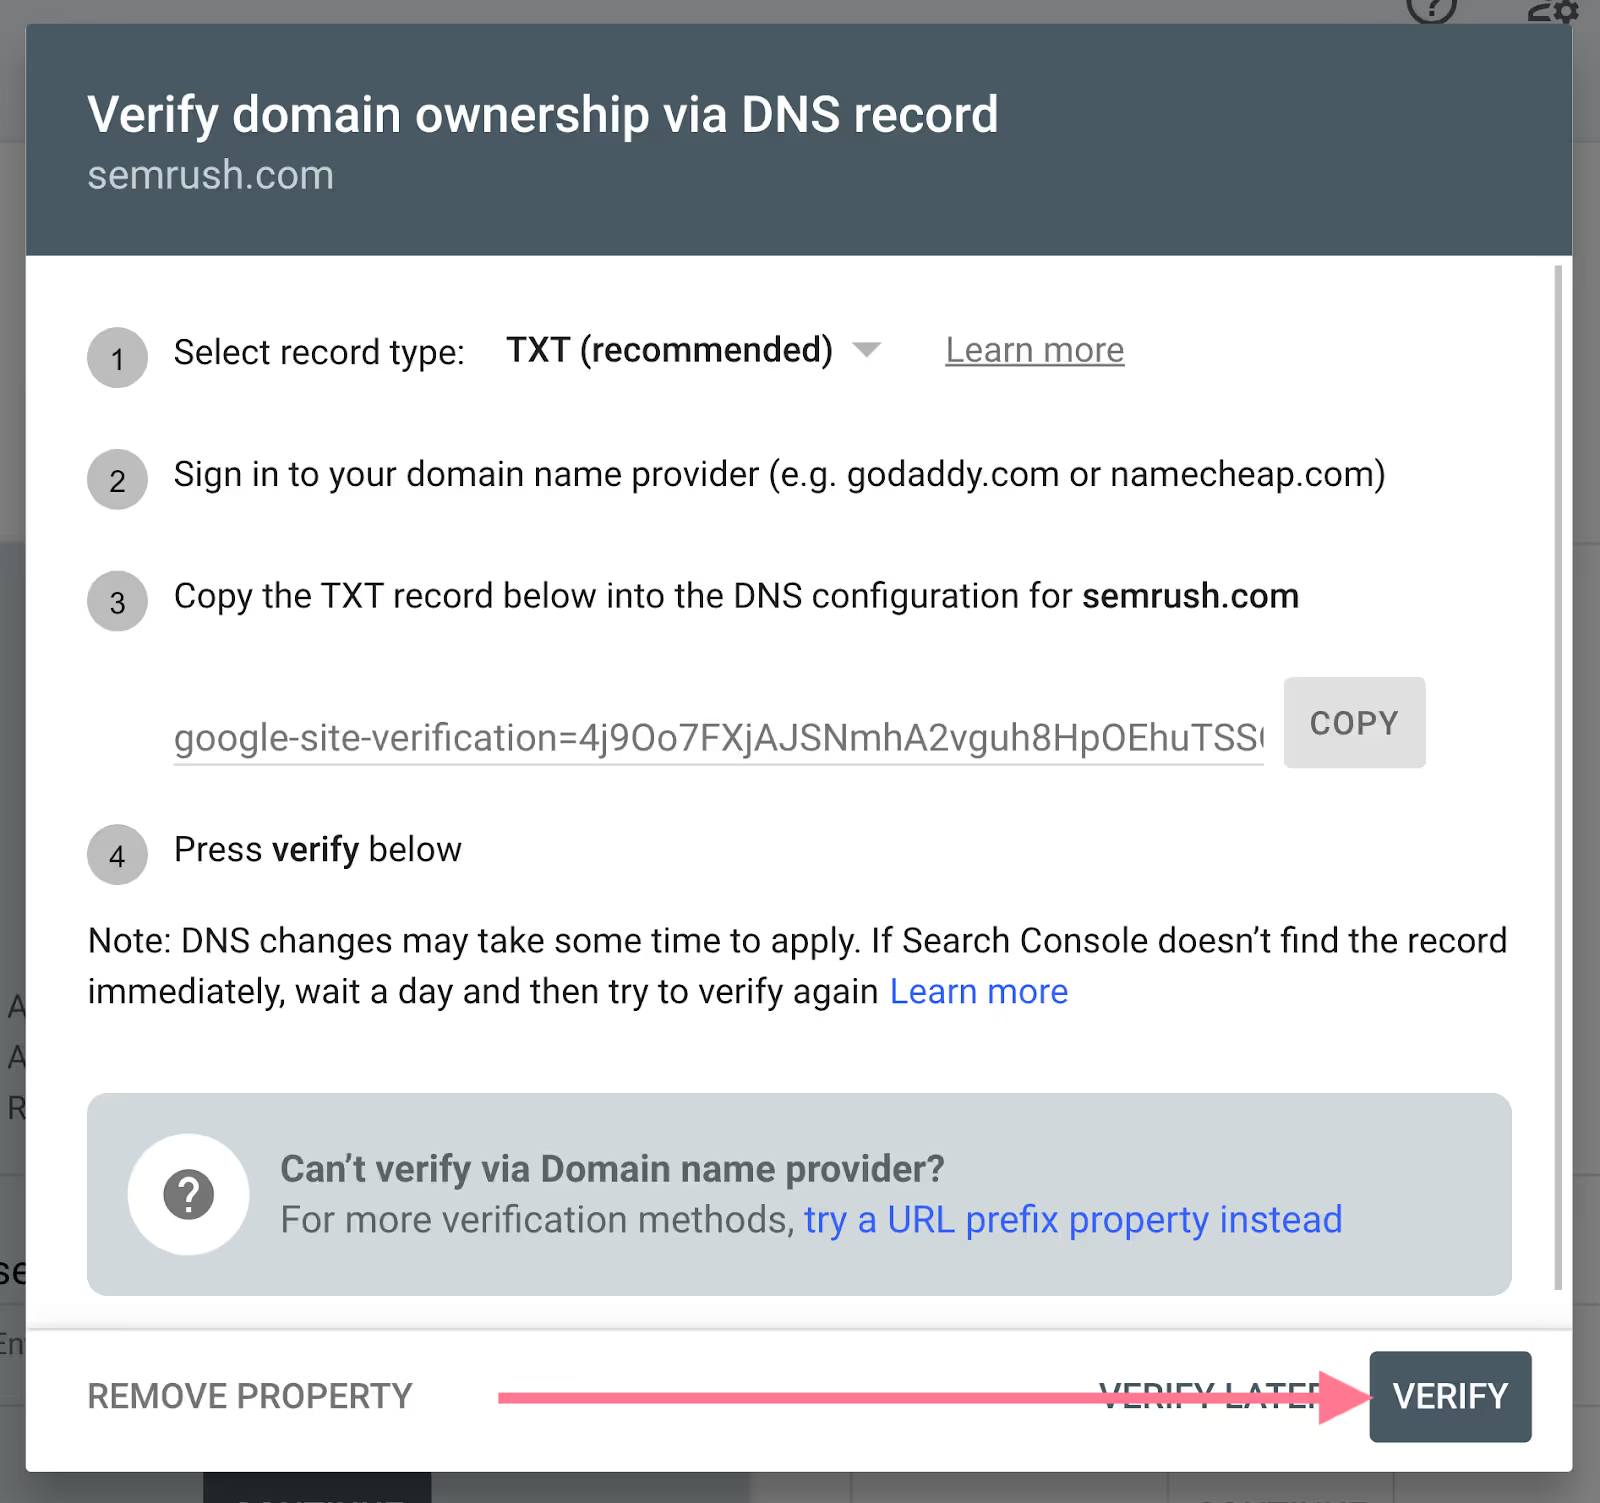
You may get a message that says “Ownership verification failed” at first. But don’t worry if the verification doesn’t work immediately.
DNS record changes can take anywhere from a few hours to 48 hours to update. Wait just a little bit, and try verifying again by choosing your website from the properties list.
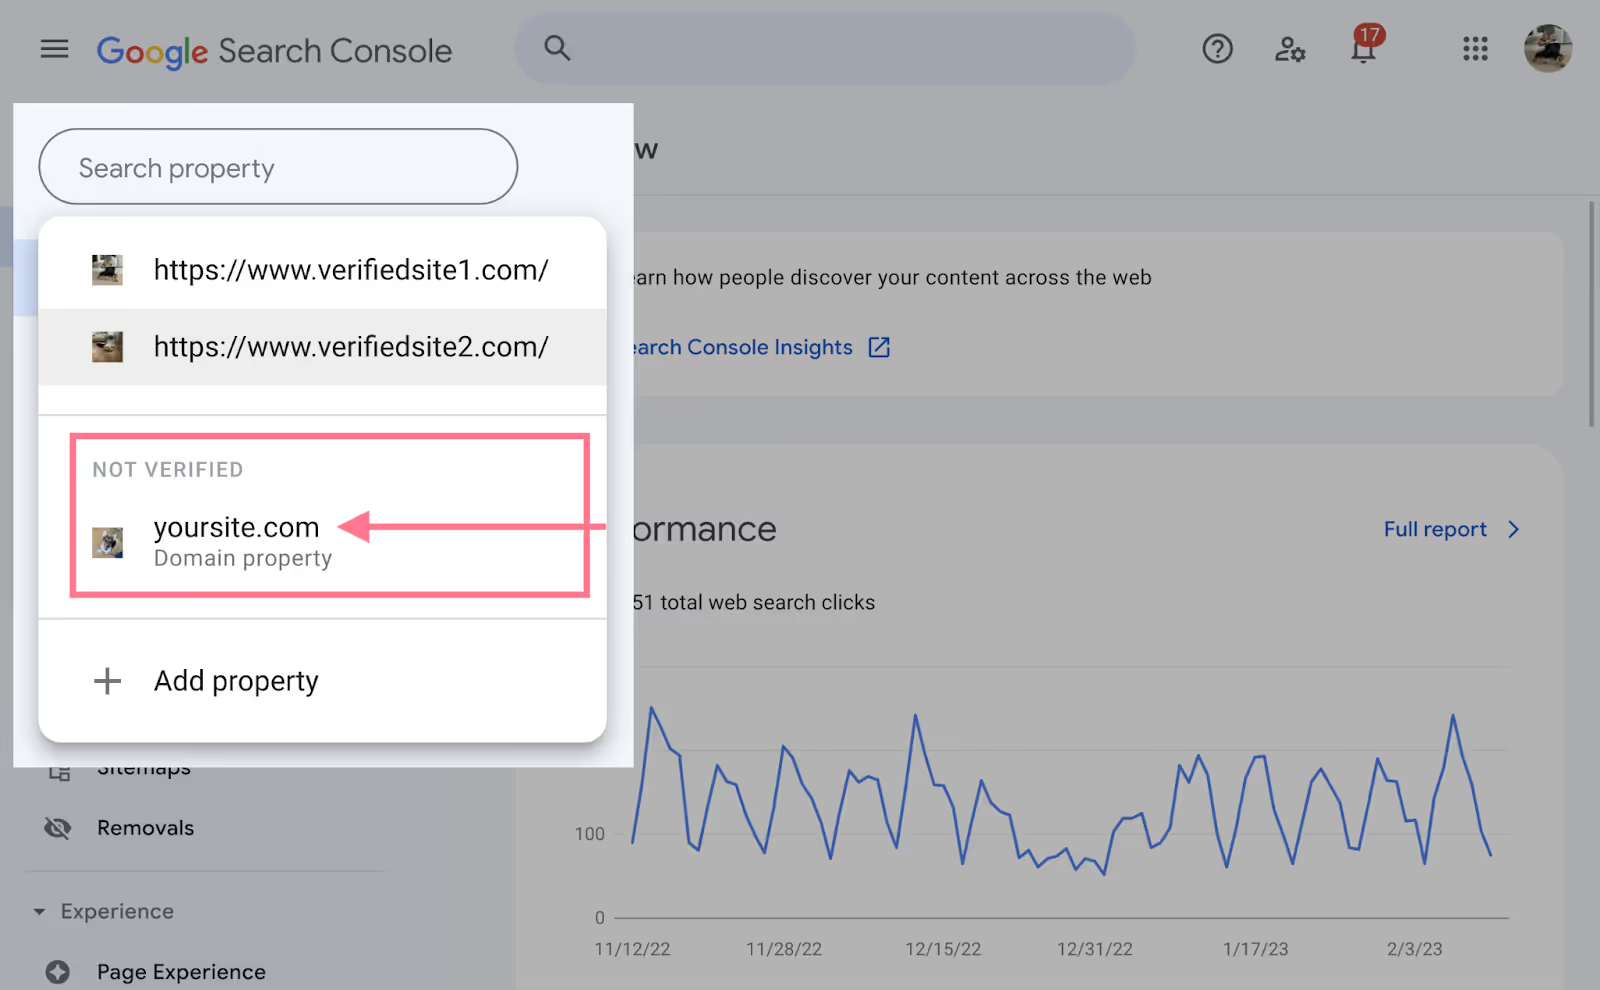
Upon successful verification, you’ll see a confirmation message like this:

How to Add a Sitemap to Google Search Console
A sitemap file includes all the website URLs you want Google to crawl and index. This is important because Google needs to crawl and index your pages in order to rank them.
Google will crawl and index your site eventually. But submitting an XML sitemap directly via GSC can speed up the process.
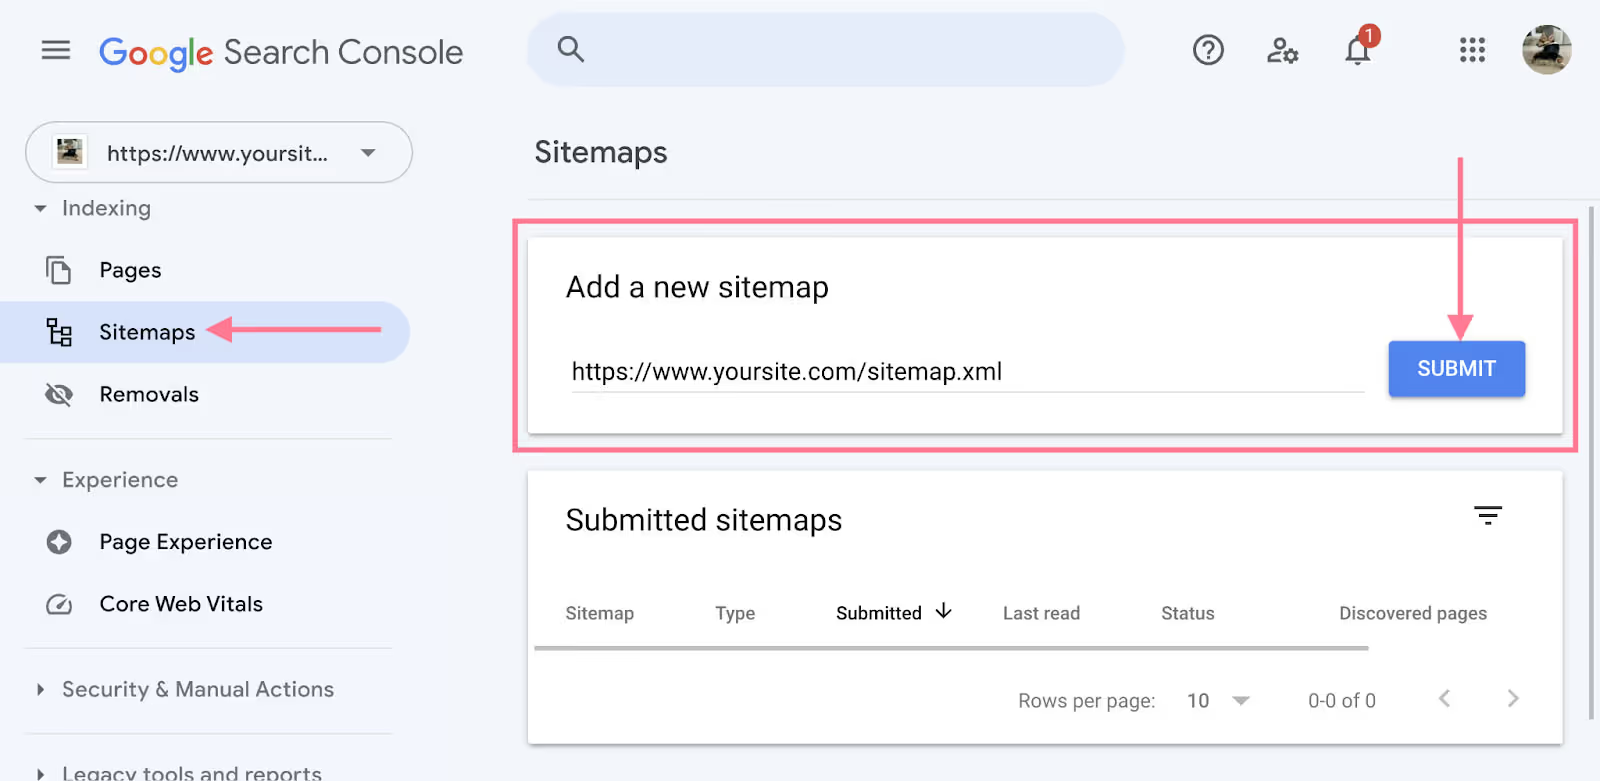
To submit your sitemap, click “Sitemaps” on the navigation sidebar and enter the sitemap URL in the given field, in the format https://www.yoursite.com/sitemap.xml. Then click “Submit.”
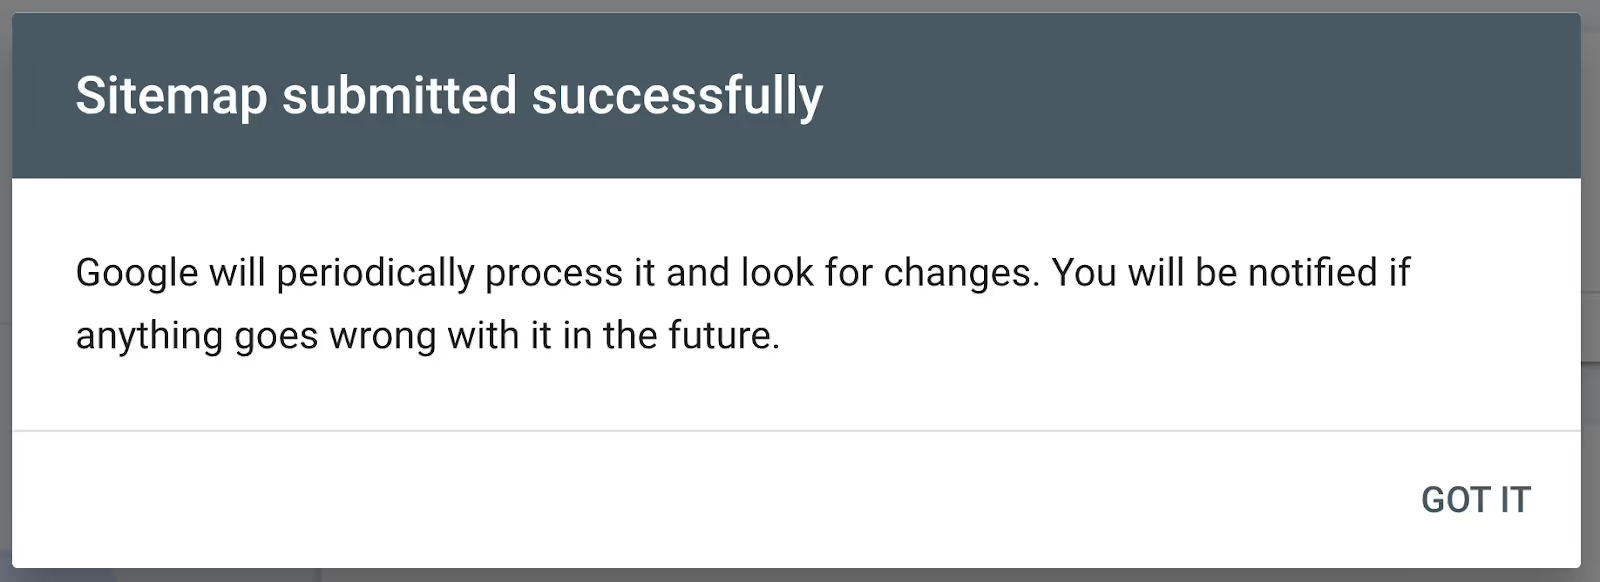
Once Google is done processing your sitemap, you’ll see a message like this:
URL Inspection Tool
The “URL inspection” tool helps you check the index status of an individual page on your website. And troubleshoot issues that may be preventing your page from appearing in Google’s search results.
Access the tool from the top bar or by clicking “URL inspection” from the navigation bar.
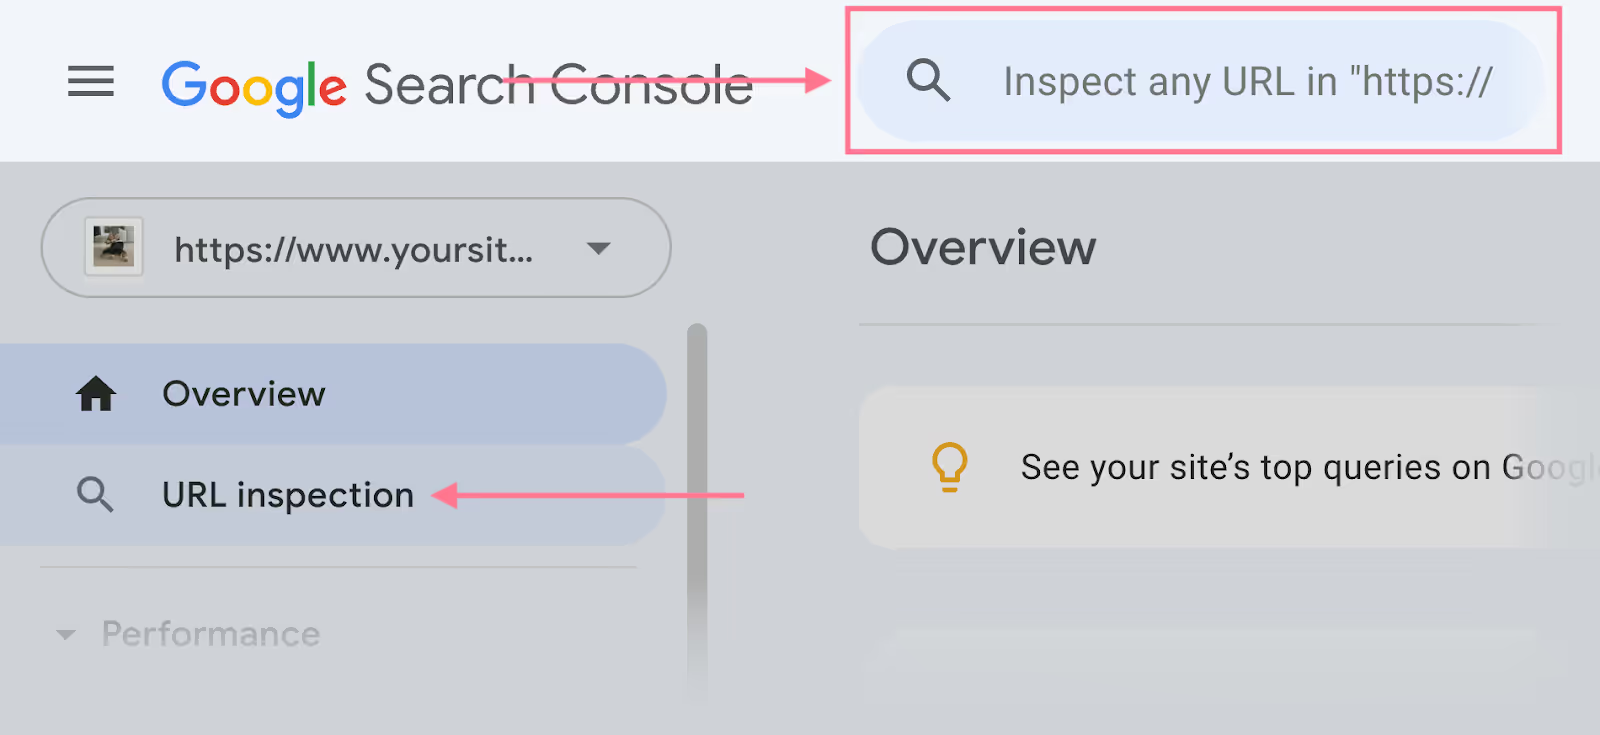
We will now use the URL inspection tool to request indexing for new pages on your site.
Paste the full URL in the inspect search box and press enter. Then, click “REQUEST INDEXING.”
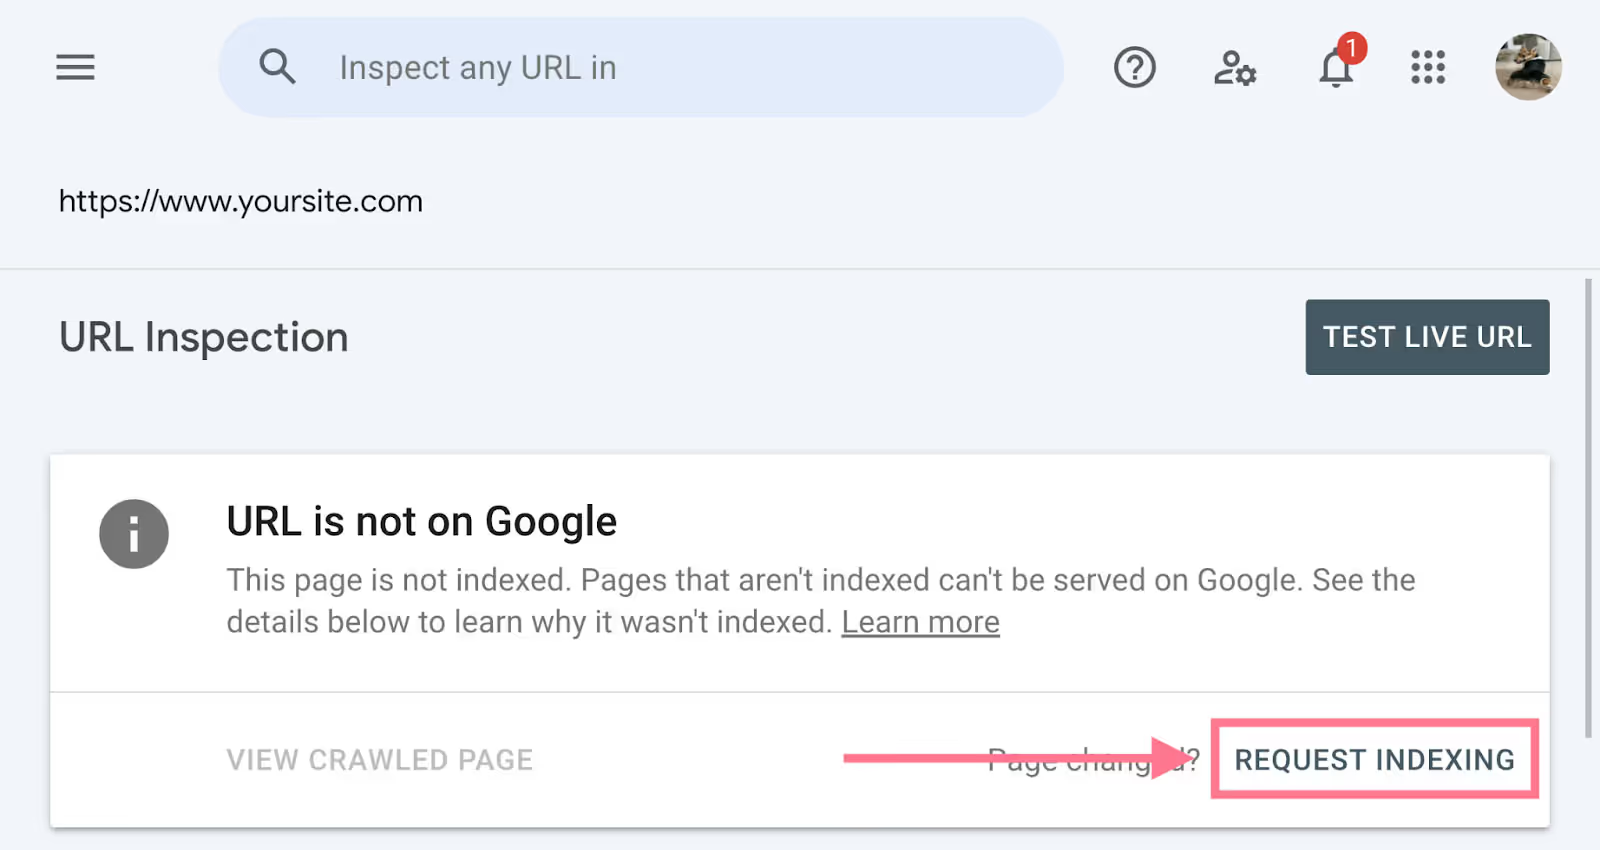
This can speed up the indexing process by telling Google it is a good time to start paying attention to your site.
That's it! Congratulations, your site has been submitted to Google!


